It was a good trip to Chicago and we successfully commissioned the system at the Sherwin plant there. Turned out that the weather has been warm in Newfoundland and they lost most of their snow because of a rain storm. Not much snowmobiling if there ain’t no snow… so while I was at the airport in Chicago I tried to change my flight to come back to Victoria. They couldn’t do it there (as it was an Air Canada flight) and gave me a number to call. I was on hold for a while and while I was lined up at the gate I finally got thru but since my bags were on the plane I had to go with them. I flew to Ottawa and tried to change my flight there but they were sold out so I decided to follow thru with my plan to head back to Newfoundland. I flew from Ottawa to Halifax and got stuck in Halifax for the night due to a freezing rain storm so I booked the flight back to Victoria early the next day. But I bumped into an old friend and we spent the night drinking and laughing at the ALT hotel bar in Halifax so it wasn’t all bad.
So after a bit of running around I was back home and ready to dive back into my teak project…
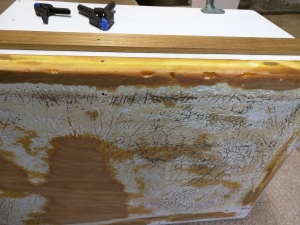
I went out to the boat to get one of the hatches and brought it back to the house to start in. This was the port side hatch which covered the main storage (actually meant for a life-raft) compartment. The teak was in pretty rough shape so I spend the afternoon scraping it, sanding it and grinding all the old teak and epoxy off it and then cleaned it with Acetone.


During this time several trips to the local hardware store were made. Actually I’m starting to get to know a few of the people down at the local Home Hardware and Canadian Tire. They are used to seeing me poking around trying to decide what tools to use for the next step and then repeat visits due to not remembering all the items I went there for in the first place.
This first hatch took much longer than it should have but I was learning the process and trying to figure out what I was doing and then how I was going to do it. I’d watch videos and read websites during the evening, work my day job and pick up supplies and start in during the afternoon. I picked up the resin / epoxy from Industrial Plastics and Paints, the screws and tools (saws, drills, sanders, grinders, sandpaper) from Home Hardware, Home Depot, Castle Building Supplies and Canadian Tire.
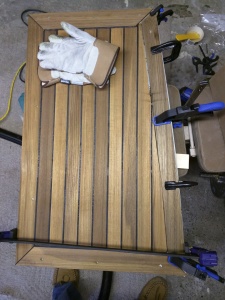
After preparing the hatch, the next job was to measure and cut the teak planks and epoxy them in place. I separated each plank by 3/16″ for the caulking. It took a few days but eventually I got most planks glued into place but the plank at the rear of the hatch was slightly bent. Looks like I got some research to do to figure out how to get the last one on. I had to leave the epoxy to dry for 24 hours before jumping back in…
Next up was the caulking between the teak planks… I purchased two boxes of caulking from the fella who I purchased the teak from as he gave me a deal. I watched some videos online and it doesn’t look too hard. So, I caulked the spaces between the boards and left it to dry for the night. I sanded it the next day but noticed a few imperfections where I didn’t add enough caulk. Oh well, I’ll “caulk” it up to experience… 🙂
Next dilemma, how the heck do you fit a straight plank into a curved slot… Whoever laid the deck had cut the teak to fit the curve but it looked a little hokey… I talked to a few people and someone mentioned something called a Steam Box used for steam bending wood. Hmmmm… That kinda sounds like what I’m looking for. I researched it a little and it seems like you can actually bend wood by steaming it for a while at 200 F. Apparently the wood fibers will actually become soft and slide and stretch and allow the wood to bend while maintaining (nearly) its original strength and its bent shape when it cools and drys. Off to Home Hardware and Castle for the supplies… I picked up the lumber to build the box, picked up some tubing, a pot and a few other things and I was ready… When I got it home I built a jig that I would put the bent wood into and clamp it down and was about to build the box when a thought hit me. Building a box seems like a bunch of work for one plank so why not just steam it in the metal dryer hose I picked up. So I put the teak plank into the dryer hose, poured some water in a pot, put one end of the dryer hose in the pot and covered it with tin foil and then a plastic cap on the other end.

I turned the stove on and inserted a thermometer into the tube and the temperature started to rise. The water began to boil and steam started to come out of the cracks in the tin foil. The heat rose to 200 F and I let it steam. After about 20 minutes I took the teak and put it in the jig I had made up and fastened a clamp to the end of the plank. Then I tightened another clamp around the other end and much to my delight the wood bent to follow the edges of the jig. I clamped it into place and left it for the night to cool.

Next afternoon I unclamped the teak plank from the jig and it remained bent… Wahoo… I epoxied it into place and the next day sanded and caulked it and put a little teak oil on and am very impressed with the results.

What a difference… The first hatch only took about 2.5 weeks. At this rate I should be ready by summer of 2017…
